For the Insider
It’s time to decorate the exterior of your home for the holidays and we all know that it can get a bit expensive when you want to put decorative greenery on your doors, lamp posts, etc. Why not make your own swags for instance?
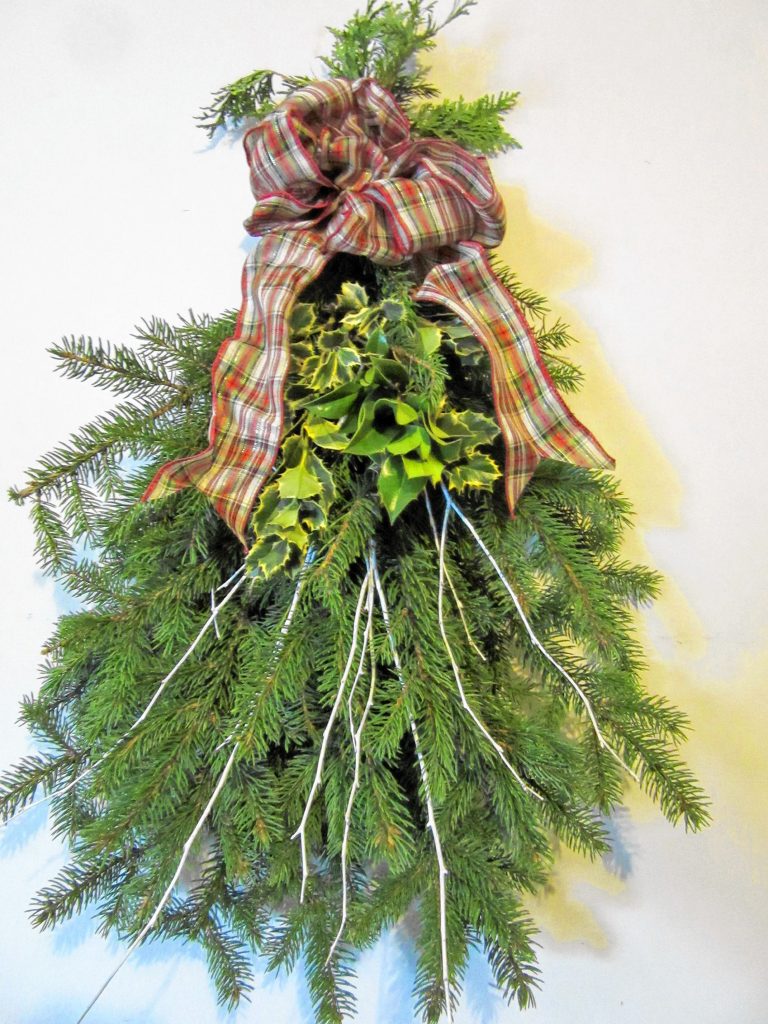
Evergreens, whether pine, spruce or fir have symbolized Christmas throughout history. Typically we associate Christmas greens as the Christmas tree itself proudly decorated and displayed inside (and sometimes outside) our homes for the holidays. The ubiquitous Christmas wreath is also a holiday mainstay, but let’s not forget the “swag.” The word “swag” is defined by Webster in one reference as “a pack or bundle” and that is exactly what an evergreen swag is — a bundle of fresh greens. In earlier days, homesteaders would gather a up an armful of fresh greens they had cut down on their property, trim and stack them into a “bundle” with twine and hang them on their front doors, often inserting a sprig of holly or two into the wrapped twine for a little extra color and texture.
Today, as evidenced by all the versions of holiday swags you see at garden centers and online, they have become as decorated and personalized as the Christmas wreaths we love to display on her homes — and unfortunately almost as expensive!
But swags are very easy to make. All you need is a small pile of fresh greens — many of which you can find on your own property. I like balsam and spruce best for the base because their branches are rigid and naturally form a good base for the finished swag, however you can use any evergreen branches. Where you will be hanging the swag will decide how long and how wide you want to make it. Typically a swag for an entrance door would be about 18 inches tall and 12 inches across at its widest point, but you can customize it to the desired size and shape as you go along.
1. Select a nicely formed branch the size you wish to have for your finished product.
2. Place several layers of branches on top of each other, longest on the bottom, graduating to shorter branches on top.
3. Once you have the size and shape you want, take a long, double strand of green florist wire and wrap it as tight as you can around the bare stems at the top of your swag, close to where the greenery starts. You can also tightly wrap duck tape around the stems as this area will be covered by your swag bow.
4. Once the branches are securely bound, clip off the excess protruding stems of the boughs.
5. Make a hanger for the swag by wrapping a long double strand of wire around the bound area and forming a secure loop.
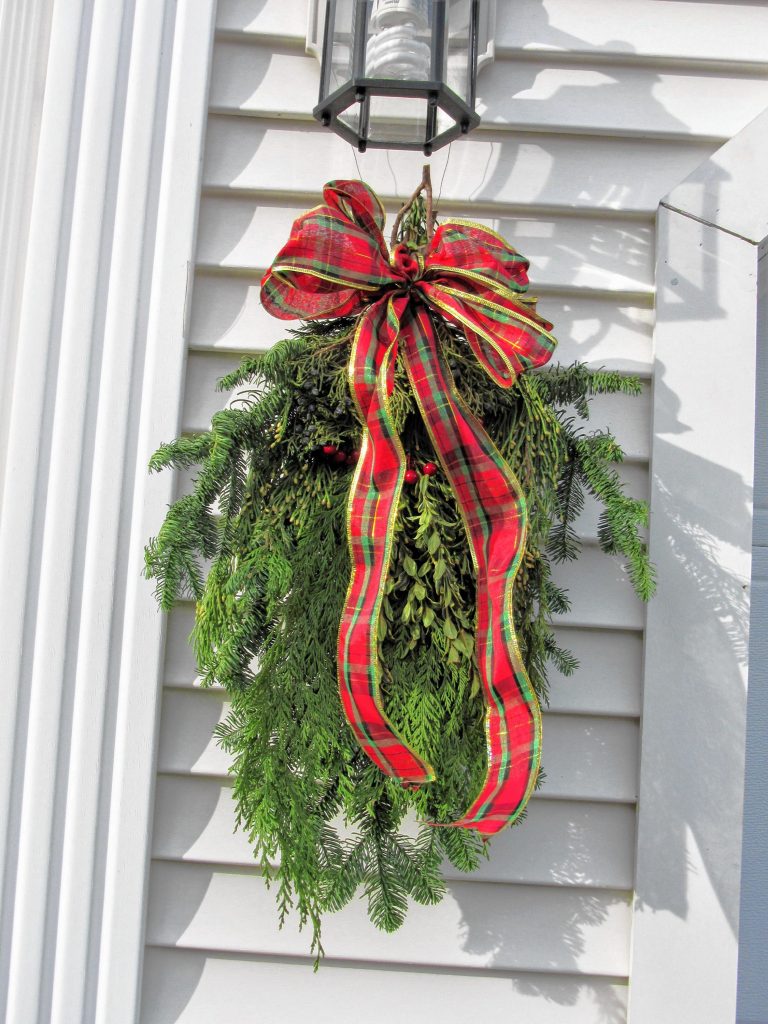
6. Now it is time to add the bow — the “crowning glory.” You can purchase ready-made bows, however, the flat ones you often see on commercial wreaths, etc. are, well “flat.” Consider purchasing a roll of beautiful and relatively inexpensive wide (3 inch) wired ribbons that are so readily available. NOTE: You should plan on one of these rolls (which usually consists of about 3 yards of ribbon) for each swag or wreath bow you want to make. The easiest way to make a floral bow is to use a bow maker, of course! Bow makers are generally a long and narrow slab of wood with several wooden dowels drilled into the base. The dowels hold your spool of ribbon as well as strands of ribbon in place as you form the ribbon loops to create the bow. Bow makers come with well-illustrated instructions to make a variety of bow styles. You can find them at most craft stores and they are usually around $10. I have had mine for years and have made hundreds of beautiful bows in various styles and sizes, quite effortlessly. But even a nicely tied bow made with large ribbon is quite lovely on a swag, especially when you let 10 inches or more of ribbon tails fall down the front of your swag to sway in the breeze.
7. One more little thing: Your swag will look nicer and more finished if you tuck a few sprigs of pine, balsam, or any other greenery down into the bound area of the swag to cover the rough stems that peek out above the ribbon.
8. Now, let your imagination and creativity take over! Suggested embellishments: I like to add sprigs of holly or winter berries, and/or pine cones that have been wired on to florist picks or wooden skewers. You can also utilize any attractive branches you might want to clip from your shrubs or wooded areas that would add different texture and color tones to your holiday swag. Add Christmas bells dangling from wire or thin ribbons, shatter-proof Christmas ornaments mounted on floral picks or wooden skewers, glittery faux branches, or real ones you have painted white or red, and whatever else you can dream up.
Decorated swags displayed on front doors are beautiful and welcoming, but also consider attaching one to your lamp post, garage or mailbox!
Joyce Kimball is a member of the Bow Garden Club and president of the New Hampshire Federation of Garden Clubs.


